Article continues below these Amazon Goodies
With September, Fall officially arrives for those that took a quilting slow down in summer, you are ready to swing back into action! This is the perfect week to give you my Merry & Bright layout. So THIS WEEK is the Layout for our weekly block. NEXT WEEK is the regular Block #6 … are you ready?

The layout has the blocks and a border, see next photo
There are a few things I want to point out so you have all the info and can decided how YOU want your setting blocks to look. I’ve shown you TWO ways it can look above and in the following video.

- Several people wrote me in the beginning as they could not figure out how was I getting ‘that number of blocks’ into a layout, my reveal explains it!
- For each of the following block patterns, the diagram above will be at the end & I’ll put the featured block in place.
- This video should help you to make a decision on how you want you setting block to look
- Do you like getting these additional BONUS videos? Let me know in the comments!

TIPS – READ THIS
- The outer border of the block is 2″ wide, which means it’s NOT the same as the inside 9patch
- I have circled this on the PDF pattern to remind you
- I decided to start cutting all the blocks at once so I can sew them as I sew other things. If you have never done that .. see what I do HERE
- PRO TIP– Upgrade your rotary cutter TODAY this one is easy to change the blade and in 3 cool colors

Here is a photo of your pattern … these are 2″ wide pieces
… incase you miss it in the PDF (wink!)

Here is my big decision as I told you about in the video. I did not sew this quilt in advance, I sew only a few blocks ahead.
My original vision was to make scrappy centers like the one on the top right. Since the fabric line I selected has a lot of darks, I have decided I’d rather have my blocks with more lights so I need another 1/2 yard of the basic light fabric that I got extra
In my supply list (FIND IT HERE) I suggest you get a basic, which means you can get more of that now if you are like me and want more lights
- BUY at least a 1/2 yd MORE of the light background – Mine is Moda Grunge in vanilla. It has some rustic texture, or if you got the Sugar Cookie get more of that
- If you can’t get more of the the light that you are using, then make your center 9patches with another light that works with what you have or go with scrappy fabrics like the block I’m showing you.
Article continues below this
*********************
Download 2018 Mystery Merry and Bright layout
*****************
Things I’m using
- ENTER YOUR EMAIL to get the weekly notice
- My PROJECT Details, including the supply list
- Border Fabric I am using in Red,and works with the bundle above of course!
- The light background I’m using is Moda Grunge in vanilla. It has some rustic texture, you could select Sugar Cookie for less texture
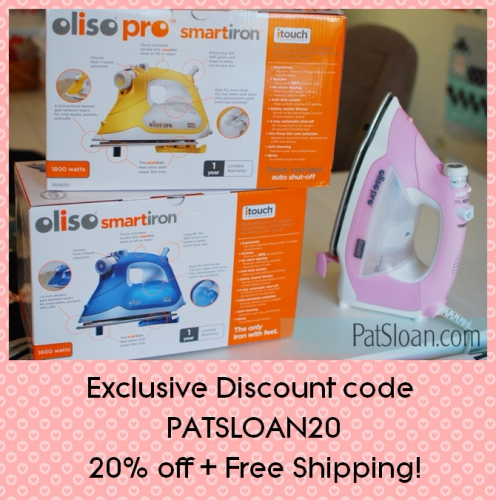
- I did a video and article about it HERE
- CLICK and Use discount code PATSLOAN20 for 20% + FREE Shipping
- Thank you for using my links to buy, it helps pay for all the fun!
73 Responses
thank you Amanda!
Mari this week is the layout. You have plenty to do! NEXT WEEK is block 6
great tip if making them all the same! since I’m not assuming what people are doing, I gave the basic directions
Linda this week is the layout. Block 6 is NEXT WEEK… did you look at the pattern.
Rose it will be used. It’s a mystery quilt so I can’t tell you exactly where each fabric goes, this doesn’t work like that. Breath and don’t over think it, just have fun
Pat, the video with extra information is great! Yes, please keep doing those if your time permits. Sara L
how cool is that!
It is so funny this is this week’s block. Last week I finished 20 2 1/2″ 9 patch X mas square blocks. I was not sure what I would do with them. I can now use 18 of them in the center of this square for the setting blocks. My quilt is basically scrappy so it will fit in.
Pat-I like to see the videos as a little extra! But my question is: you say to buy at least a 1/2 yd more of the light background than the 1 1/2 yd. basic for backgroun which you stated in your supply list at the beginning of the Merry & Bright quilt along. I understand that, but what are we doing with the extra 1/2 yds. (#3, 4, & 5) of the supply list that you gave us? #6 is for Border – what about 3, 4 & 5? I’m stumped.
The Layout is Block #6 The Setting Block as listed on Page 2, Right?
Some comments said this is not Block #6!
Yes Pat – Love the bonus videos. Any time you want to do them.
I love the setting. Thanks for telling us early, and showing us two different ways to create it. I’m like you…I love the lighter version.
Amanda in KY
Where is the link for block 6 or Merry and Bright???????
my blocks are totally scrapped together from different fat quarters. I don’t even have a background color, so this will tie it all together.Love It. Videos are always a good thing!
Any help I can get, I will take it! Thanks for the video, the explanations and ideas on how to place the blocks and colors to use. I also thank LJ Parr for her idea of how to make the strips.
So, I was confused too!! I get it now… these are not one of “THE BLOCKS,” but a setting block. So, it’s not Block #6… it’s more of a bonus block for layout purposes. 🙂 As I said, I was confused too, but I get it now. Thanks so much Pat for all your hard work and these wonderful patterns!!
Hi Pat! I have a tip for zooming through those cornerstones in no time!
1. I like to cut my fabric by WOF (2 strips of 6.5″ x WOF and 4 strips of 2″ x WOF)
2. Sew one 2″ strip to the top of the 6.5″ strip and another to the bottom (It will be red white red and 9.5″ x WOF when finished)
3. Then cut your prepared piece into 36 2″ segments so you end up with a 2″ x 9.5″ strip with a red square at the top and one at the bottom. Now you don’t have to cut and sew 72 2″ squares one by one!
I’m happy to see the scrappy blocks in here–I’ve used a few different lines of fabric and was wondering how to pull them all together. This will help a lot!
you are welcome!
Robbie I’m not sure what you mean, you can do the math on what you need. width of fabric is 40. 40/2 = the number of PERFECT 2″ blocks cut from a strip.. subtract a few .. see how many 2″ wide strips you need to use all the same fabric … like I said above, I’ve NOT made all the blocks i just know I’m ONLY using that starting bundle… I do my free Wed blocks like this
You are so welcome Jo ann!
i don’t piece with 80 wt Donna, I do all my piecing with 50 wt by hand or machine..have fun .. hope it’s out of the’spa’ soon!
So happy you love it Darlene!
You are so welcome Kim!
thank you for sewing with me Lana!
you are so welcome Glenda!
Glad my video added to it Linda!
When I get to make mine, it will be in blues with silver and white. As for the videos, I don’t watch them. Just something about them, no matter whose it is, I just can’t get in to them. I am one that just wants the measurements and away I go.
Love the video…always fun to see you, Pat! Thanks for all your creativity and hard work for us all! You’re the best!
Hi Mary Anne, thanks so much for solving my problem! My husband just finished telling me “it’s your quilt, do what you want”. Your solution is terrific! I hope it is okay to share from your idea. I’ve already done 10 houses plus cut the sashing 4 a quilt 4 or daughter & hubby 4 Christmas.
Arline heal up! There is NO BLOCK 6.. it is JUST A SETTING..Read the pattern and let me know if you still need help.
Lynn this week is the quilt setting pattern. The setting is made up of setting blocks, and borders. Take a look at the pattern and read it and let me know if you still need help.
Since this is my quilt, I am free to do what I want!!😀 For those of you who don’t like the idea of setting blocks , make it like you want. I think I will go back and repeat some of the blocks to use to fill where pat is using the setting blocks. I will then sash all the blocks with the all same fabric to unify the quilt blocks. Make it to suit you!! How fun. It will be interesting to see what everyone does !
My understanding is that this is just setting blocks. Block 6 is next week!
Thank you Pat ! This a great layout & so looking forward to getting started on them in between the weekly blocks
Pat, is this an actual featured block (#6) or is it going 2 be used as a filler? I wouldn’t want that if it is a filler.
Thank you, Pat, for the tips, video, and the two visuals of the setting block! This helps me a lot! I am really enjoying this sew along!
Hi Pat,
I wasn’t going to join this sew along, as I am neck deep in other sewing projects. Your layout changed my mind! I am going to print out the blocks and get some pretty fabric to make this quilt. I’m thinking red, green,ivory with touched
if gold. Maybe even make another one in shades of blue, ivory with silver.
Thank you, for all you do, and for adding another
quilt to my list.
Since my broken arm is not yet healed enough to be cutting fabric I am savings each weeks post to a file so I can do catch up in a few weeks and I must admit this one threw me. When I first read this weeks post I didn’t see a print button, well I read through and realized that this weeks post includes Block 6 (which is at towards the end of the post) as well as the layout.
Can’t wait to make this one for a Christmas gift to a dear friend.
Pat you surprised me with the layout. I wasn’t expecting to make 18 aulternating blocks. I knew you had a plan of some sort as you started out with 17 blocks at 9” square so I knew you had a plan but I was expecting something totally different.
You shocked me!!
This will keep me busy that’s for sure.
Thank you so much for your patterns and advice while we make beautiful quilts with you
My sewing machine decided to take a ‘poop’ and quit sewing correctly. Something with the tension is messed up. It will take approximately 4 weeks to get it back from the shop. Saying this means if I want to stay caught up I will be piecing by hand. My question is should I continue using the same thread that I have in my machine (Aurifil 50 wt.) or use the 80 wt that I use when doing EPP?
I appreciate your advice….
Donna
Love this sew along. Patterns are easy to complete and will make a great Christmas quilt. Thank you so much pat. This has been so much fun!
Just double-checking. If I decide to use the same red fabric for both the 2×2″ blocks and for the inner border, how much fabric do you suggest? The supply list shows 1/2 yard of “Red Sprigs”, but not sure if that’s enough for both. Thank you so much – I love this quilt! I’ve been making extra blocks each week for table runners for our Church Harvest Auction. Too cute! And, yes, I do appreciate the videos – I need all the help I can get! LOL
Correction to post. Thank you Pat for these fun blocks. I love it!
113 N 3300 E
Thank you for sewing with me Crystal!
That’s why I do it Tracey, so you can plan and work ahead. Thank you for sewing with me!
Patricia,
The setting blocks are our blocks for this week. She is really doing us a great favor by giving them to us this early. It will allow you to see how you want your quilt to develop and match with future blocks.
I hope this helps and Pat, I hope that I’m not out of line for replying.
Thanks Pat! I love this pattern and setting! Thanks for all your hard work at theses sew alongs!!
Hi Pat thanks for writing. I’m showing you the same block with 2 different centers so you can see how it looks in the layout and decide for yourself If that is what YOU want to do. Everyone is so visual if I didn’t show it you wouldn’t really see how a darker color 9-patch is unless I show one in the layout. Did you look at the pattern yet? it is ONLY the layout there is not other block they are identical blocks, just different color centers. Does that makes sense?
Hello,
I’m confused about post. Are both of the blocks shown part of the layout or is one the next block #6. They look different and it seems like when I look at the layout below you only use one of those blocks all the way thru. I watched your video and understand about using more light fabric. I just don’t understand why there are two different blocks shown in the beginning of this tutorial and no download for this week. I hope this makes since
Pat Gallo