
Article continues below these Amazon Goodies
It is always good to test your 1/4″ seam allowance to be sure it’s accurate. If you change machines or maybe you just never tested it, this is a super simple way to be sure your seam allowance is 1/4″.
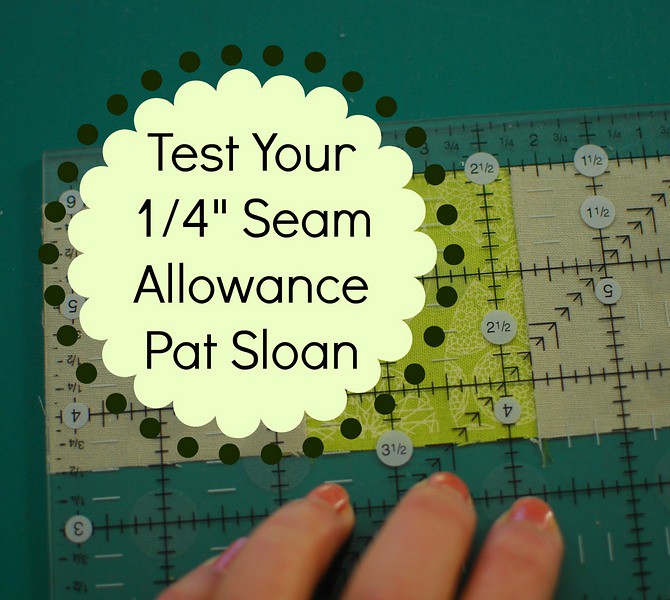
Even if you have a 1/4″ foot for your machine it might need to be adjusted.
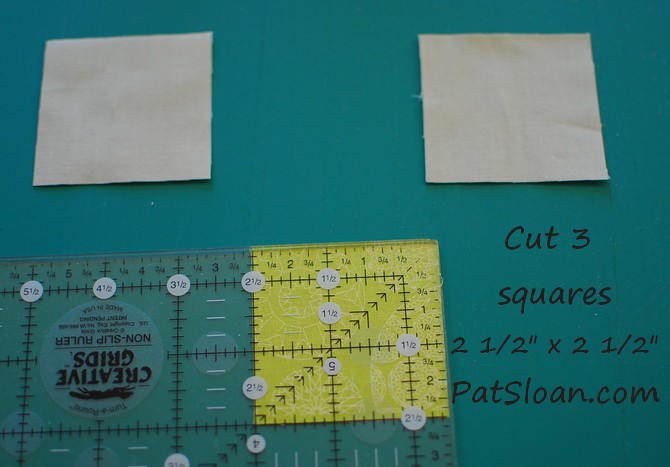
Cut 3 squares 2 1/2″ x 2 1/2″. Use different color fabrics
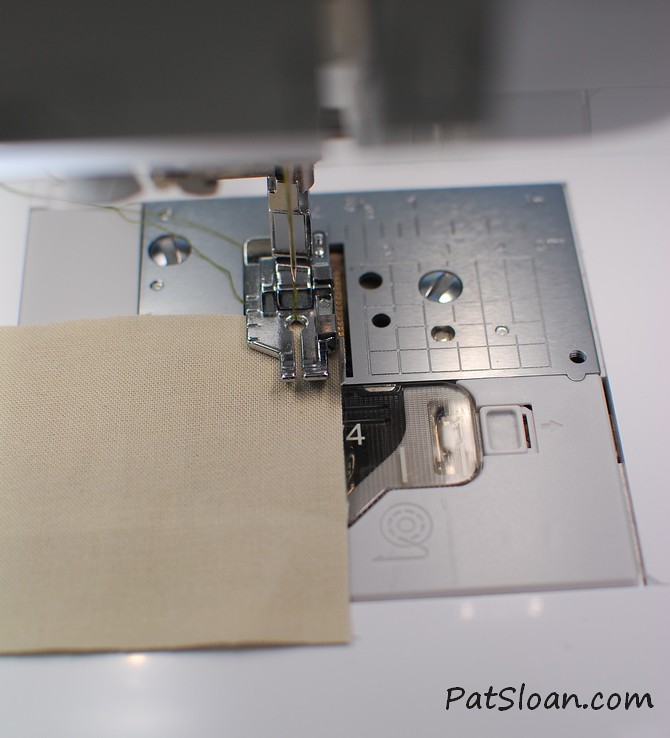
This is the 1/4″ foot for my Babylock Crescendo. I love the guide on it. Your machine may have a different foot, or no 1/4″ foot.
Sew the 3 squares in a row.

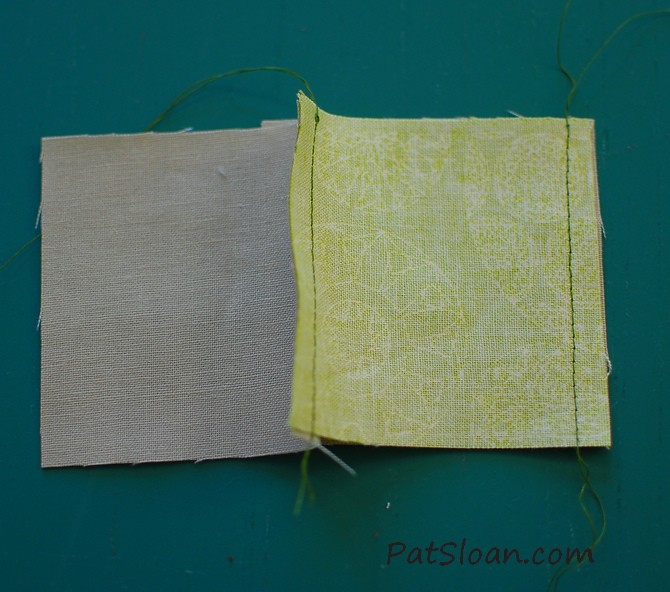
My Babylock’s 1/4″ seam foot sews a ‘scant’ 1/4″ seam. Do you see how the seam is to the RIGHT of the line. When you fold over fabric it takes up a little space, so sewing with a seam just ‘shy’ of 1/4″ is what works for most people.
I have this little 1/2″ wide ruler that i keep by my machine to check things.

press the unit so the right sides are up for all 3 squares. Do you see how the seam allowance creates a ridge?
This is before i pressed it. when you press you need to have it flat. That way as you sew the units together they all are at the correct size.
now let’s test it!
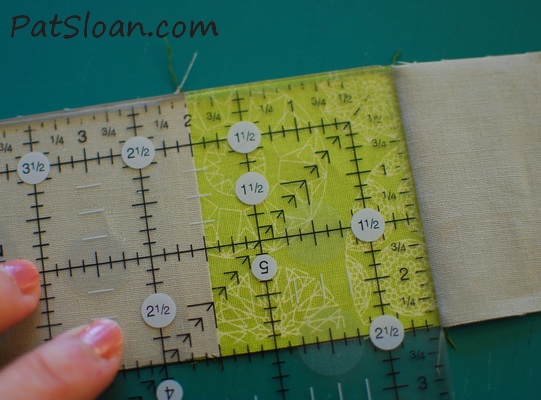
First I measure JUST the center block. It should be 2″ wide.

Now i measure the entire unit. It should be 6 1/2″ wide. When I test I like to shift that ruler down and have a straight line across the top and bottom of the patchwork. There is a bit of a shadow on the top right, that’s even. You can click the photo above for a larger image.
If your block is not accurate, then you need to work on things to find that 1/4″. You can shift your needle to the right (although not with the foot I’m using). You can check your 1/4″ foot to be sure you HAVE the 1/4″ foot. Maybe you are using the wrong foot. If you don’t have one, shifting the needle position should work for you.
My 6.5″ rulers are the very best size for so many things. If you don’t have one get one soon!!
You can Buy the 6.5″ Quilting Ruler


Need a New cool iron? Use code SAVE15 for 15% off with FREE Shipping!
Find my Triangle book On SALE!
New to my site?
- Join my newsletter
- Subscribe to receive my newest articles in your inbox
- Listen to my Podcasts
- Join me at my Facebook Quilt Along
- Join my FREE Sew Alongs!
- I have a TON of freebies
- Find me at Instag

19 Responses
Thanks for this article Pat. I will be doing the test today. I’m excited to be doing the SSampler and hope to learn a lot
you are welcome!
I am so happy with my studio!
you are welcome!
you are welcome!
wonderful!
you are welcome!
great!
you are welcome!
it’s a good thing to test!
I have a Brother… same as Babylock……… and same foot…. i usually have to set my needle at 4.0 instead of 3.5 that is factory set. to get my scant 1/4 inch seam. it still works with the foot without breaking needles.
i think it is amazing how many seasoned quilters in my guild don’t know this trick!!
Oh my…I so appreciate you giving us tips to help with our sewing…thank you so much!!! Great tip!!!
Thank you for this great tip!! Will try this next time at my machine.
Thank you, Pat!
Thank you for the tips, Pat. I am going to sit down and enjoy “Teach Me to Machine Quilt” this evening. ~smile~ I am sure I will learn more tips there as well.
Using 3 squares is a vital part of your tip! Thanks!
What a great video on checking your 1/4″ seam. You do such a nice job of explaining it. Thanks.
Thanks for the great info! Your studio looks fabulous since your redo. Thank you for all the fantastic blocks you come up with and so very graciously share them. You are appreciated! I’m having a fun time following along, although I sometimes have to play catch up!!!!
This is great! Thank you.